Showing posts with label Sewing. Show all posts

Wednesday, October 2, 2013

DIY: Bandana dresses

Last month I made these little bandana dresses. I was strolling over the market and came back with a heap of these colourful and cheap bandana scarves. We played dress-up with some but there were still some left over. So came the idea of making little dresses for my little girl (who is no longer that little to be correct). I copied one of her simple sun dresses for the pattern and used bias tape for the neckline, the arm holes and the straps. You can find a similar pattern here.
I made one simple black one with smocking and a green and yellow patchwork dress (which needed a tiny bit of smocking in the middle, too because it was too wide). Those dresses are made in no time and can be worn over a tee or if the weather allows just like that.

Thursday, September 12, 2013

DIY: Fabric doll / Rag doll


This is Linda the new best friend of my daughter. I made Linda from a linen fabric that was still lying around from another project. You don't need much fabric to make such a little rag doll. The hair is probably the worst part. I tried to sew it onto the head with my sewing machine before I put the doll together. But then you have all the hair inside the body while you are closing the seams and it makes the sewing a bit difficult. So maybe it's better to stitch the hair onto the doll by hand. Or you can use a nice fabric that looks like hair...

Here is a free pattern if you want to make your own:

Source: http://www.pinterest.com

Friday, August 9, 2013

DIY: Car playmat to go

I made this car playmat from two no longer used fabric napkins and a few other fabric scraps. First step was to sew the two napkins together. Therefore I cut the seam on one side of both napkins and sew the two napkins together. The new seam is covered with black ribbon (or bias tape). Then I cut decorations from the fabric scraps. Flowers, birds, dragon flies, clouds and little houses. I spread them over the playmat and appliqued them with a zig-zag stitch. Then I added a little 'garage' for the toy cars and some wooden play signs. It was made from a rectangular piece of fabric. The open side has a bias tape hem. I fixed the rectangle on the sides and divided it with seams to form four little pockets. Last came the streets. I painted them with fabric paint and fabric markers. And afterwards I stitched the outlines with black thread. Add three cars and a few signs for playing and then roll and fold the mat and put it in a small drawstring bag. Now you are ready to go and play!

Friday, August 2, 2013

DIY: Simple leather tote

Here comes my new yellow leather tote. I made it for my birthday. A gift to myself so to say... It's very simple. Just eight rectangles (20 cm x 23 cm) that are put together to make the front and the back. Then you need two more rectangles (10 cm  x height of the bag) for the sides plus one rectangle (10 cm x width of the bag) for the bottom. The handles are made of another two rectangles (8 cm x 80 cm).
You start with the front and the back. Start sewing two pieces together and repeat this until all pieces are used up. Then put two of the new pieces together for the front and the same for the back. The seams show to the outside. Then sew the sides to the bottom piece (seams go inside this time). Now sew the new sides to the front (seams on the inside). Do the same with the back. Now you need to work on the handles. Fold them over and sew along the edge leaving 10 cm open on both sides. Open the ends of the handles and put them flat against the inside of the bag. Fix the handles with a horizontal seam. Voila that's it. Enjoy your new masterpiece!

Thursday, July 4, 2013

DIY: From placemat to toy storage

I found these placemats in my cabinet and wanted to throw them out but then I had this fine idea. Just a few seams and voila you have turned them into a box. Just close the side and the bottom and then make a seam along the corners of the bottom seam so give them the box shape. Roll half of it down and that's it. You can use them just like that or sew a few together like I did and hang them somewhere. Very quick and easy!

Friday, May 17, 2013

DIY: Cloud t-shirt

You might have noticed that I am in love with clouds when it comes to kids' stuff. So here is another quick t-shirt upcycling idea. I just cut a cloud out of an old t-shirt and sew it onto a new one. I simply used straight stitches for that. It's made within no time and looks great!

Friday, May 3, 2013

DIY: Cloud cushion

I am in love with clouds for kid's stuff. Whether it's cushions or shirt deco I can't resist. So I had to make one for Ragna's room. I used a simple towel from IKEA to make this one. It's pretty easy. Just cut two pieces in cloud shape, sew them together leaving a small gap open. Turn it inside out, fill it and then close the seam and do a contrast zig zag stitching all around the cushion. I used yellow thread for it. But the options are of course endless...

Thursday, April 25, 2013

DIY: Pastel beads necklace

This is another little necklace I made for my daughter. I made the ribbon from a 4x50 cm piece of leftover fabric. The beads are from an old necklace but you can find similar beads in craft shops or at amazon. Just fold the piece of fabric like bias tape and stitch the seam. Thread the beads and then adjust the length according to your needs. Close the loop with a knot. Find a pretty model and take a photo...

Wednesday, April 17, 2013

Beanbag No 2

I still had a big bag of styrene pearls left over from a beanbag that we bought and then later found that it didn't fit into our tight appartment. Step by step I am turning the large beanbag into smaller ones. So here comes beanbag no 2. This one is more like a pouf. Very comfy to sit on. I have made an inner cushion for the pearls and an outer shell with zipper that can be removed and washed (very important when you have six little sticky hands in the house). The canvas fabric is from IKEA. At the moment the pouf sleeps next to our daughter's bed in case that she falls out of her bed. But it's also very handy at playtimes. Instead of kneeling on the floor I can sit pretty.

Wednesday, April 3, 2013

Made by Mama: Summer sleeping bags

I made these sleeping bags a few weeks ago for our trip to Thailand. I can't help it but the sleeping bags I find in shops here in HK are not my taste. So this time I made them the way I like them. Not that much work. Plus I have reduced part of my fabrics piling up everywhere...
(I simply copied an existing sleeping bag for the pattern.)

Monday, February 25, 2013

A quick skirt

I just made this skirt with elastic waistband for my daughter. I simply copied one of her existing skirts for the pattern. I absolutely love the UNIKKO pattern from Marimekko. Originally I had bought it for my ERGO baby carrier. I used it to make strap covers. But there was quite a bit left over and so little one has a new skirt and the boys have stylish strap covers!

Saturday, February 23, 2013

DIY: Sammy Snake

2013 is the year of the snake. So here comes an easy DIY project for a big snake plushie. You need a knitted scarf and a rectangular piece of fabric in the same size for the inner cushion. Just fold the scarf double and close the seam on the long side. I have turned the sides of the scarf into half circles and closed the seams like that. If you want to wash the outer shell separately it makes sense to have a zipper in the long seam. Follow the same steps for the inner cushion but leave a small part of the long seam open for the filling. You can use either soft cushion filling (buy a few cheap cushions from IKEA) or beanbag pearls. Decorate the outer shell with big buttons for the eyes.

Tuesday, February 5, 2013

DIY: Triangle bib

This is another t-shirt recycling project. Since my boys are still bringing up a little food now and then I was looking for some bibs that would also look a bit fashionable. But I couldn't find anything. I only digged up one triangle scarf made of jersey that was alright. So I decided to make similar ones out of old t-shirts. I just cut triangular pieces of jersey out of the t-shirt. They are just as long to fit around the neck and be closed with a simple knot. I used zig-zag stitching on all three sides and decorated them with name tags I had bought earlier at www.namensbaender.de . Now they can drool along without me having to change their shirts three times a day!

Wednesday, January 9, 2013

Patchwork Haute Couture

 
Source: http://blogger.lookonline.com/
Source: http://www.style.com/
Source: http://beaspokequilts.blogspot.hk/

I had seen a beautiful patchwork bed cover made of black and white Marimekko fabrics. I tried to find it online without success but while I was searching I found this beautiful alternative. And also those terrific patchwork dresses. Spring 2013 seems to be the time for a patchwork dress. I am thinking of making one for myself. Now that I don't need to breastfeed the boys during the day anymore I can wear dresses again. That's going to be one of the next projects! Maybe I can also revive the sewing project of the months. We'll see...

Wednesday, January 2, 2013

DIY: Easy t-shirt scarf

Do you have a favourite t-shirt that is getting too small? You could turn it into a scarf so that your child (or yourself) can enjoy it for longer. Just cut off the upper part and the bottom seam and then cut fringes into the top and the bottom part. You can use it like that or you can fold it in the middle and sew it together with the zig-zag stitch of your sewing machine. On top you can decorate it with pompoms or embroidery or whatever you like. This only works for t-shirt material as it won't fray.

Sunday, December 23, 2012

DIY: Pompom shirt

This is a very quick and easy way to style up a simple white shirt. Just get a pompom ribbon in the same colour and sew it onto the neckline and the waist seam. Make sure you use the zigzag stitch so that the seam is still elastic. It's also very nice for Christmas combined with a red skirt or red trousers.

Sunday, November 11, 2012

DIY: Sleeping bag for baby doll


My daughter's baby doll has got a new sleeping bag. I made this one in one evening session and she was so happy and thankful the next day when she saw it. Baby has worn it every night since. It's made of a single layer of fabric and the armholes and the neckline are finished with bias tape. It closes with a zipper in the front. I used three different fabrics (one for the back and two different ones for the fronts) and I decorated it with a nice ribbon and an applicated little bird. Maybe I should also make one for the real babies...

Wednesday, October 31, 2012

Happy Halloween - Boo


Happy Halloween! My daughter is a little ladybug this year. I made her costume from a black tee, some pom poms and red felt. Just cut wings from the felt and use some pretty lining for the backside. Sew a few pom poms onto the wings and then finally sew the wings to the back of the tee. I used a black lace skirt to complete the costume which also got a little pom pom deco in the front. The antennas are also made from pom poms that I fixed with craft wire to a hair band.

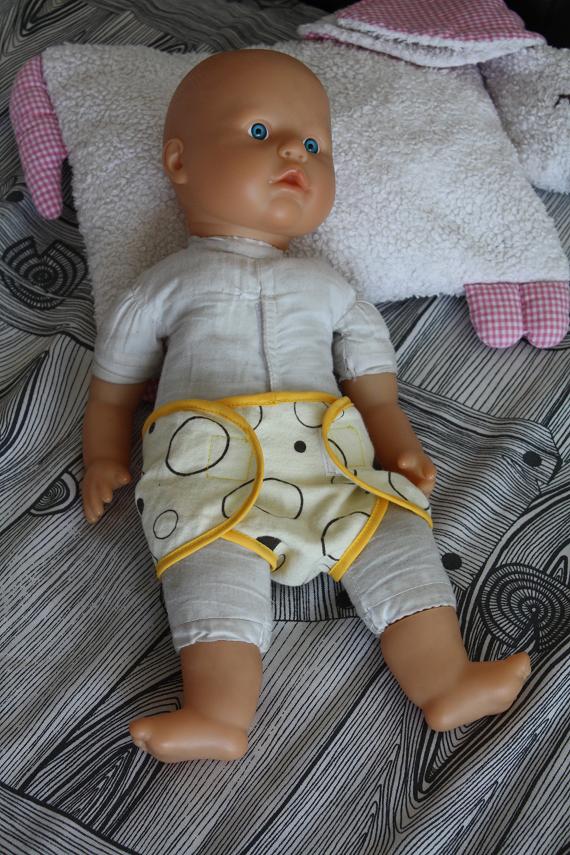
DIY: Nappies for a baby doll


Another little project. I made these nappies for my daughter's baby doll from fabric scraps and bias tape. They close with velcro. My daughter was super excited about them making me a very happy mommy. If you are interested in the pattern let me know and I can send you a copy. It's for a 40 cm tall baby doll.

Friday, October 5, 2012

DIY: Colouring set on the go


For our trip to Germany I got behind my sewing machine again and created this little bag for crayons and colour books. So that we could take it everywhere we went. It's really handy. Now our little one can colour when we go out for coffee or to a restaurant. And we can enjoy the outing even more. It was quickly made out of a few leftover pieces of fabric.
Related Posts with Thumbnails